Over the summer, I created a website and attendance tracking system for WCI's Computer Science Club.
I started this project for two main reasons:
- I thought it'd be a fun project to work on
- I always thought it'd be cool to have a website for the CS Club (at the time we didn't have one)
Read on to find out what happened when the website was first launched to the club...
Overview
At a high level, the web app is designed to be as simple and intuitive as possible, both for the members logging their attendance, and the executives setting up the attendance page every week.
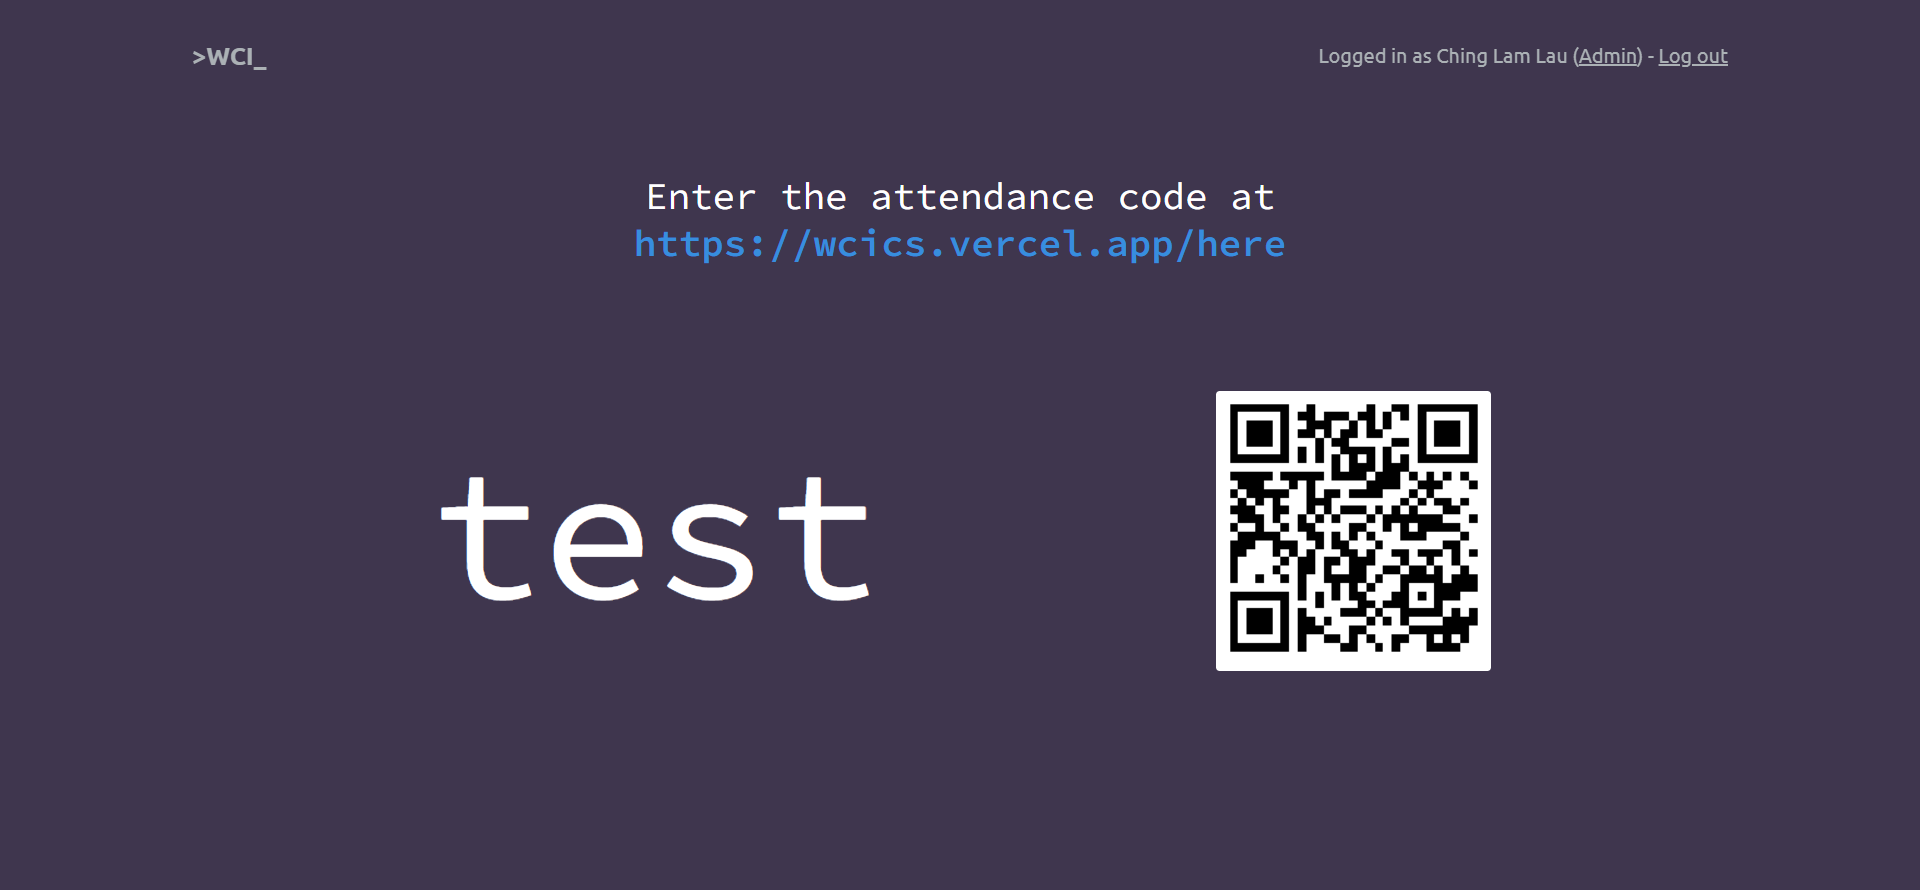
From the member's point of view, all they have to do is scan a QR code, which will track their attendance for that meeting. If they're not already logged in from a previous session, they'll have to log in with their (school) Google account. Alternatively, there's also an option to manually fill in the week's attendance code in a web form.
For the executives, the process is just as simple. Once they navigate to the admin page, they can create an attendance code, which has some default options for start/end time and date. From there, they'll have to click a link to display the attendance code onto the screen. The admin page displays all previous attendance codes and the members who were present at that meeting.
 Attendance page
Here's the detailed rundown of how I built the website, including how I created the design and the tech stack I used.
Design
The first step I like to do when building any website is to gather inspiration from similar websites—in this case, club, organization, and hackathon websites. I sketched out some ideas on paper and transferred it onto a Figma design.
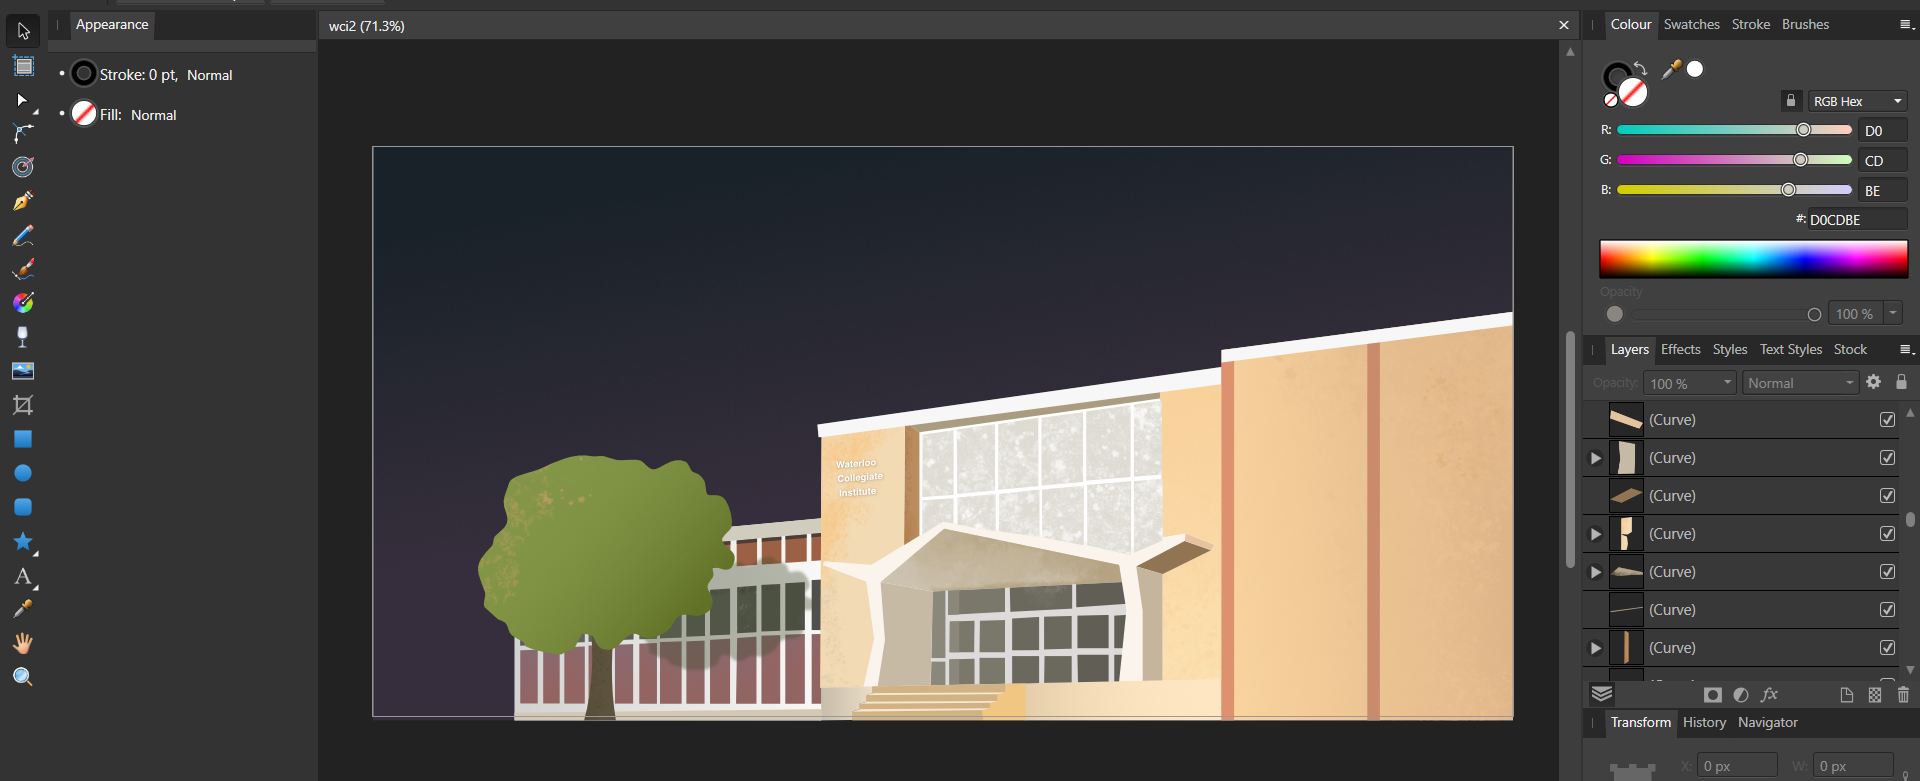
I really liked Hack the North's website (2022), so the design is largely inspired by their website. I even stretched my design capabilities to create a design of the school, which turned out to be decent.
 Design in Affinity Designer... I spent too many hours on this
Frontend
The frontend of this website is fairly simple, and doesn't use any of the popular front-end frameworks that you might think of (React, Angular, Vue..). The entire user interface is built with HTML and CSS (on top of Flask's Jinja templating), and JavaScript for some dynamic components of the website, such as the mobile hamburger menu.
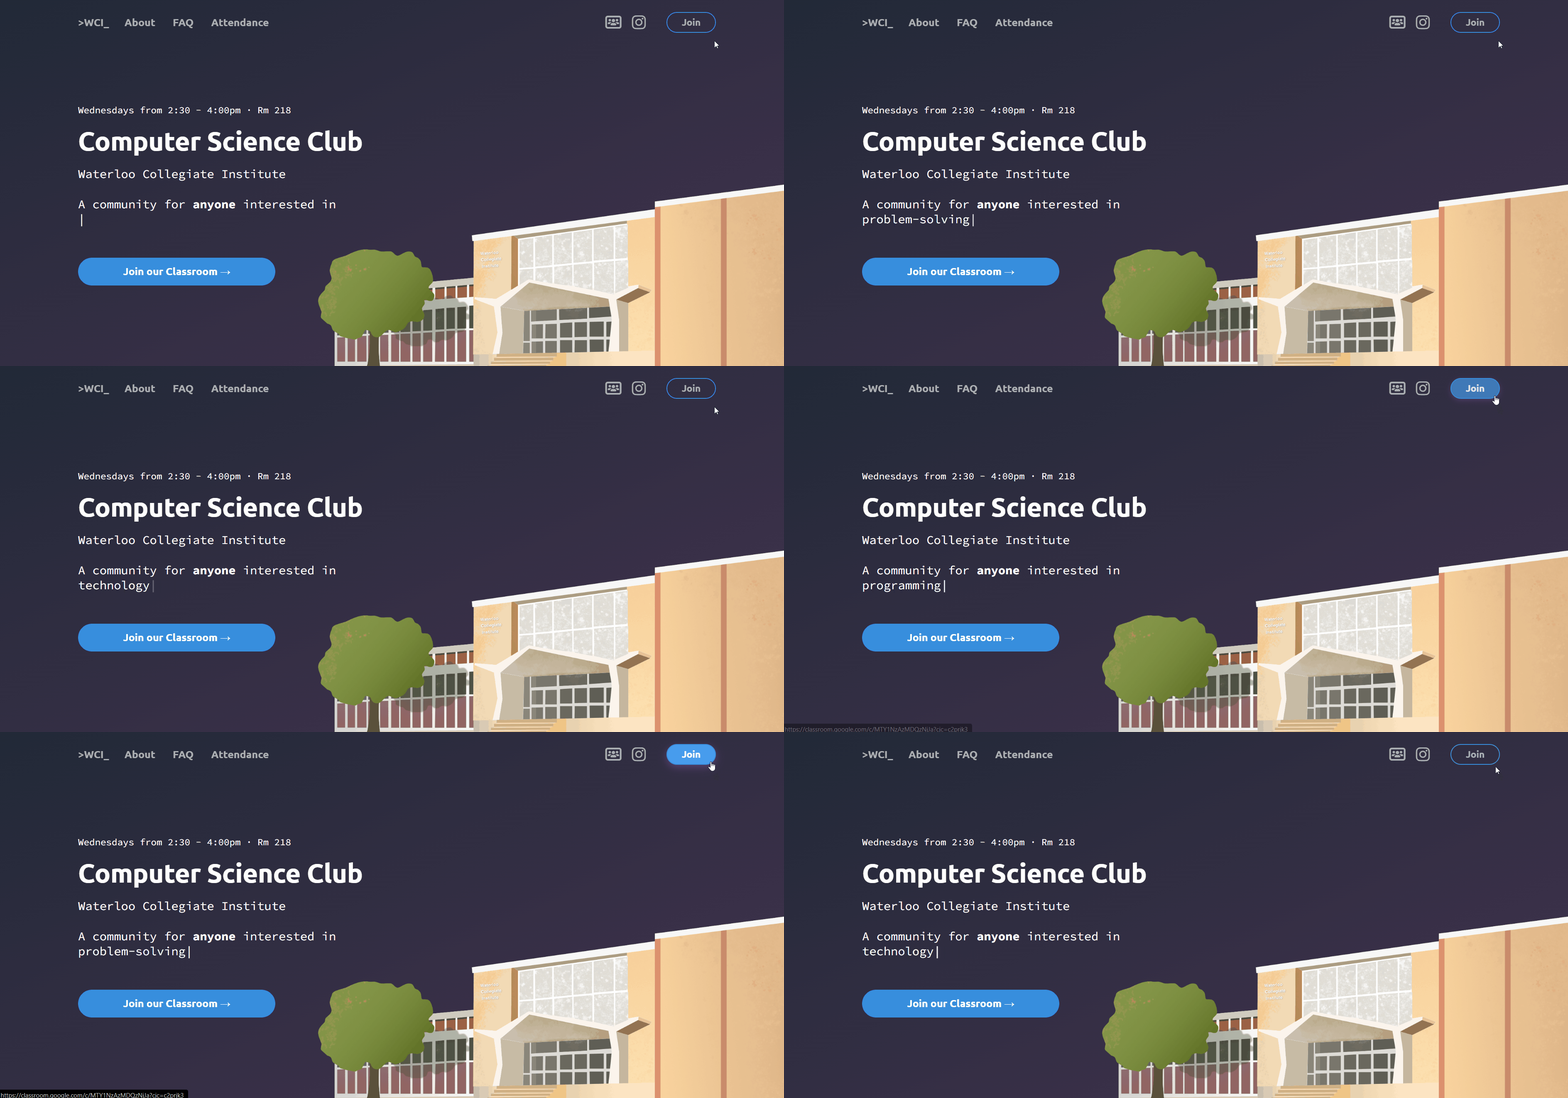
Here's the landing page in action:
 The landing page uses
 typed.js for its cool typing animation
Displaying dates in the correct time zones
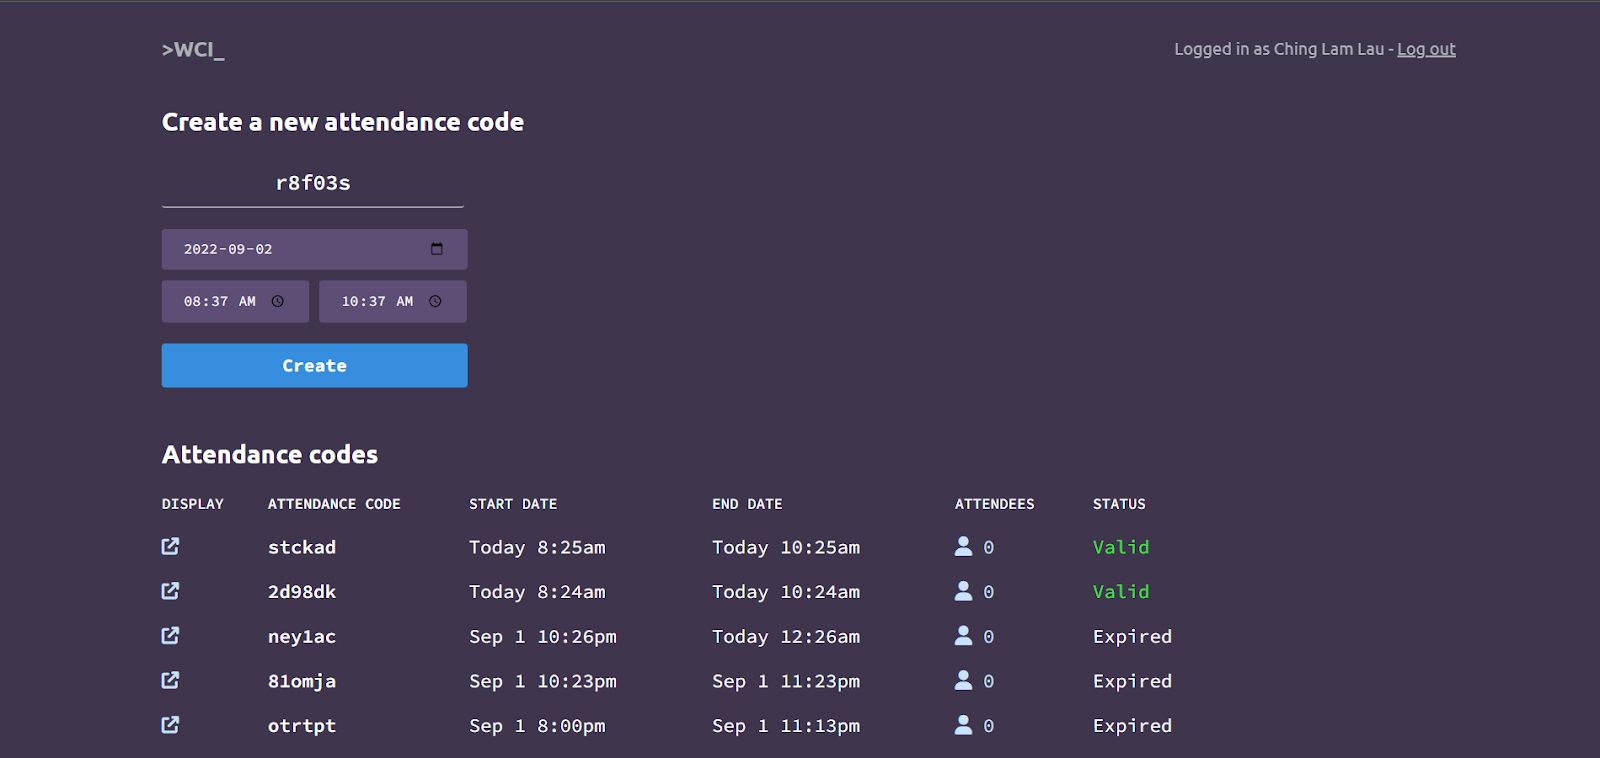
One of the problems that I ran into while creating the admin page was making sure the dates were displayed in the correct time zone. The dates were calculated on the Flask backend, causing the dates to be displayed in the server time zone, which may not be the same as the user's time zone.
To fix that, the code for displaying the dates had to be on the client side. The date and times in the web forms were generated by the client, which then had to be validated by the Flask backend, once the form was submitted.
 Auto-filled date and times for attendance code creation
Backend
The backend is built with Flask, and makes up all the logic for authenticating users and recording attendance codes.
I chose to use Flask for three main reasons:
- Previous web apps built by the club used Flask—other club executives were already familiar with the framework
- I've already had experience connecting to Google OAuth and PostgreSQL using Flask
- It would be easier for future executives to pick up Flask, since most people are familiar with Python
Authentication
The web app uses Google OAuth to authenticate users, which was the easiest method to ensure users had accounts that were linked to their real names. Google OAuth is easier to implement than the classic username and password login method, and also removes the need to deal with user passwords. After the user logs in, Google provides the user's name and email, which are stored in a database and associated with their attendance records.
Database
Everything relating to users and attendance codes are stored in a PostgreSQL database. Flask makes it very easy to connect to a PostgreSQL database, with flask-sqlalchemy, and database migrations are handled with flask-migrate.
Attendance tracking
When a user submits an attendance code through the web form, the inputted string is checked against all attendance codes stored in a database. If the attendance code exists and is valid (the current time is between the start and end time), then a new row is added to the database recording the user and the attendance code. The QR code image is generated from api.qrserver.com, and is a link to the attendance code submission form /attendance?code=<code>, where code is the attendance code.
Deployment
The web app is deployed on Vercel, since Heroku announced that they would shut down the free tier in November. The deployment process was fairly straightforward, however, the one drawback was that Vercel didn't have a built-in database. After comparing the free tier plans for different PostgreSQL providers, I ended up using Supabase, for its generous 500MB of free storage.
There were a few things that I had to set up specific to Vercel, including: adding a vercel.json file and using index.py as the entry point of the Flask app.
Launch
Fast forward two months from the development of this website, and it was time to test out the attendance tracking system with our club members!
Upon releasing the website, there were two immediate problems:
- At least half of the club members got out their phones to scan the QR code... only to realize it didn't link to the website.
- After users created an account after accessing the attendance page, the web app redirected the user to the home page instead of the attendance page. It didn't help that there was no link to the attendance page on the navbar, which made the process even more confusing.
After a bit of troubleshooting, the club members were able to record their attendance, but not without a bit of initial confusion as the web app didn't work as intended 😅.
Overall, I enjoyed creating this website and it was rewarding to see it being used by the CS Club members every week.

